What’s the most satisfying thing for you as a tumbling teacher?
It’s unquestionably seeing your students execute flawless run-ups, twists, flips, and landings on the tumbling floor.
You should feel rightfully proud, too. After all, teaching tumbling takes hard work, patience, and careful coaching.
Being both an art form and an athletic discipline, tumbling can be challenging to teach. But things start to get easier once you break down the training course into bite-sized lessons. The question is: How do you plan those lessons?
This article is a complete guide on how to write a tumbling lesson plan. Read on to understand what goes into tumbling lesson plans. We’ll also take you through the key steps to drafting a successful tumbling lesson plan.
Why a Lesson Plan Is Important
Do you really need a lesson plan to teach tumbling class?
The short answer is “Yes.”
You can’t just wing it when it comes to tumbling lessons. Well, you could, but then the lesson would seem disorganized, unprofessional, and unfocused.
Frankly, lacking a lesson plan just invites chaos. You’ll be jumping between techniques with no real structure or goal to the learning process. And the end of the lesson leaves you wondering where all the time went.
To be more specific, here are five reasons why every tumbling session needs a lesson plan:
Approach Tumbling Lessons with Confidence
You know the confidence you get when you’re so well prepared for something? Well, that’s what lesson planning gives you.
Imagine standing in front of a tumbling class with no idea where to start. Everyone is looking up to you for instructions and to impact skills and knowledge as you struggle to piece together a worthwhile lesson. That’s where panic sets in.
A lesson plan prepares you before every session. You know exactly what to do from the moment the lesson starts and all the way to the end. Plus, you have all the props and materials you need to see the lesson through.
Manage Time Effectively
Scheduling is a big part of lesson planning.
A good lesson plan breaks a training session into distinct time intervals. Then, allocate each time interval to a specific activity. For instance, a tumbling lesson may start with five minutes of introduction, 15 minutes of warmups, 20 minutes of practice, and so on.
Time management helps you utilize every valuable minute in a training session. That minimizes time wasted and gives each lesson a flowing structure.
Track Student Progress
It’s easier to track each student’s tumbling progress when using a lesson plan.
As a tumbling teacher, it’s your job to ensure that the training sticks. That means assessing each student’s progress. You also want to know which routines or techniques are giving students a hard time. Luckily, lesson plans have provisions for tracking progress at the individual level.
Also, careful planning enables you to design lessons targeting each learner’s skill level. Whether you’re training beginners or elite gymnasts, a good lesson plan should have you covered.
Create Result-Oriented Tumbling Lessons
Each tumbling lesson must have an objective. What do you want your students to learn at the end of the lesson?
A lesson’s goal might be pretty straightforward. For example, when teaching particular techniques such as a round-off, whip-back, or back handspring. Meanwhile, some lessons have more fundamental goals, like when training balance, posture, strength, or flexibility.
Such training goals are defined in the lesson plan. Doing so clarifies the lesson’s expected outcomes for both you and your students. More importantly, setting lesson goals helps you keep the training session highly focused and productive.
Maintain Control Over Training Sessions
You can think of a lesson plan as a rule book. It dictates what must be done, when, and how. Such guardrails are essential in a tumbling class.
It’s pretty easy for a tumbling class to spiral out of control. For instance, some students might get too enthusiastic about certain routines or props. Even trainers sometimes get carried away from the main lesson.
When this happens, you can always fall back to the lesson plan to get things back on track.
RELATED ARTICLE: How to Write a Dance Invoice with Free Dance Invoice Template

The Key Components of a Tumbling Lesson Plan
What exactly goes into a tumbling lesson plan? It incorporates these seven key elements:
Scheduling
A tumbling lesson plan often begins with a schedule or timetable. Break the lesson down into manageable segments, allocating time to the various activities.
Pre-Assessment
Pre-assessment involves evaluating your students to determine their tumbling skill level and knowledge. Knowing this will help you figure out where to begin. It should also help you set the lesson’s difficulty just right.
You can do a quick pre-assessment before or during the lesson. However, it’s always best to start a tumbling lesson with a good idea of your class’s abilities.
RELATED ARTICLE: 18 Summer Dance Camp Ideas for All Skill Levels
Learning Objectives
We’ve already touched on the importance of setting objectives for each tumbling lesson. To recap, defining learning objectives is the basis of a result-oriented lesson.
Each lesson’s objectives will, of course, depend on the class. Just remember to set clear, reasonable, and achievable goals.
Resources
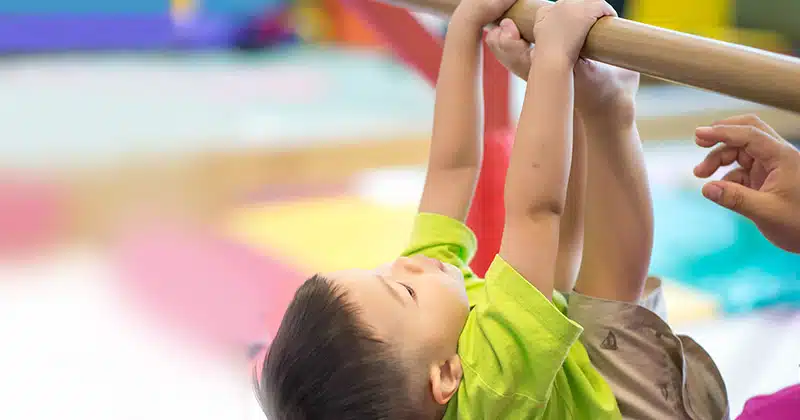
Tumblers need nothing more than a well-padded 82 ft x 6.6 ft floor. However, tumbling classes may involve a lot more than just the floor. You may need props such as floor mats, balancing beams, and barres when teaching a tumbling class.
Such props make tumbling not only easier to teach but also fun for the trainees, especially when training kids.
Guided Training
This is the part where you actually teach your class the various tumbling techniques and routines. Remember, these have to be in line with the lesson’s objectives. Also, be sure to note your training approach and style in the lesson plan.
Practice
After guided training comes the practice session. Allocate some time in each lesson for your students to practice what they’ve learned. Let the learners practice the new techniques on their own (under your supervision).
Practice makes perfect. On top of that, a practice session helps you gauge how the class took the training—was it too easy, too difficult, or just right?
Evaluation and Follow-Up
Measure your teaching success at the end of each lesson. Conduct a quick evaluation of the lesson’s effectiveness by answering the following questions:
- Did the lesson meet all its objectives?
- Was everything the class needed to learn available?
- Did the lesson stick to its schedule?
- How do my students feel about the lesson?
FROM ONE OF OUR PARTNERS: How to Keep Track of Invoices & Payments: A Comprehensive Guide
How to Write a Tumbling Lesson Plan
Here’s a step-by-step guide to creating a tumbling lesson plan:
Step 1: Understand Your Tumbling Class
Start by knowing your students. Do so by answering these questions:
- How old are the students?
- What’s their tumbling skill level?
- How long have they been learning tumbling?
- What is the purpose of training (school curriculum, competition, hobby, fun, etc.)?
- Are the students motivated to learn tumbling?
Understanding all this should help you design a lesson suitable for the particular class. Based on this knowledge, you can determine the lesson’s ideal difficulty and teaching approach.
Step 2: Define the Lesson’s Objectives
Set goals for the lesson—what do you want the students to learn? Again, this will depend on the class. For instance, you can’t expect beginners to learn a backhand spring in just one lesson. Similarly, you can’t teach cartwheeling to a class of expert tumblers.
List lesson objectives that align with the class’s abilities and expectations. Ensure the lesson builds on what the students already know while introducing something new.
Step 3: Determine the Learning Activities
Figure out the activities needed to teach the class. In tumbling, learning activities include stretches, poses, light cardio, guided techniques, and demos. Choose a set of activities that closely align with the lesson’s objectives.
Step 4: Gather the Necessary Materials
Gather and prepare all the necessary learning materials for the lesson. These may include floor props, trainer notes, videos, music, etc.
Step 5: Design a Timetable
Time management is a crucial component of lesson planning. So, design a timetable that makes use of every available minute in a tumbling lesson. A 90-minute lesson timetable might look something like this:
- 15 Mins—light cardio
- 10 Mins—warm up and stretches
- 5 Mins—lesson introduction
- 20 Mins—demos and guided training
- 30 Mins—supervised practice
- 10 Mins—conclusion and assessment
Step 6: Determine the Lesson’s Success Metrics
Determine a way to measure each lesson’s success. You want to find out if your students have actually learned something at the end of the lesson. And whether what they’ve learned corresponds with the lesson’s objectives.
You can do this with a quick test where every student demonstrates the technique or routine you’ve just taught.
FROM ONE OF OUR PARTNERS: Revenue Forecasting: Step-By-Step Guide

How You Can Start Writing a Tumbling Lesson Plan Right Now
- Use gymnastics class management software like The Studio Director to organize your studio’s administrative tasks so you can focus on your students.
- Download tumbling lesson plans and templates from reputable sources such as TPT.
- Assess your current lesson plans for inconsistency and ineffectiveness and make the necessary changes.
- Review different tumbling lesson plans and pick one that works best for your class.